Using Dell Command Configure to Modify Bios from Microsoft Intune
Español:
El dia de hoy aprenderas a integrar Dell Command Configure (archivos .exe) para poder hacer modificaciones a la Bios en Equipos Dell desde el portal de Microsoft Intune. Despues de hacer varios intentos y encontrar el camino (solucion) mas no se si exista al 100% compatibilidad de las herramientas de Dell con Microsoft. Les quiero compartir el proceso que realize para lograr el objetivo.
English:
Today you will learn to integrate Dell Command Configure (.exe files) to be able to make modifications to the Bios in Dell Computers from the Microsoft Intune portal. After making several attempts and finding the path (solution) I don’t know if there is 100% compatibility of Dell tools with Microsoft. I want to share the process you do to achieve the goal.
Español:
El primer paso es tener un equipo de referencia en donde vamos a descargar la herramienta Dell Command Configure, puedes encontrarla en este link. Vamos a crear para este ejemplo la modificacion del password buscando la variable setuppwd
English:
The first step is to have a reference team where we are going to download the Dell Command Configure tool, you can find it in this link. We will create for this example the modification of the password looking for the variable setuppwd

Español:
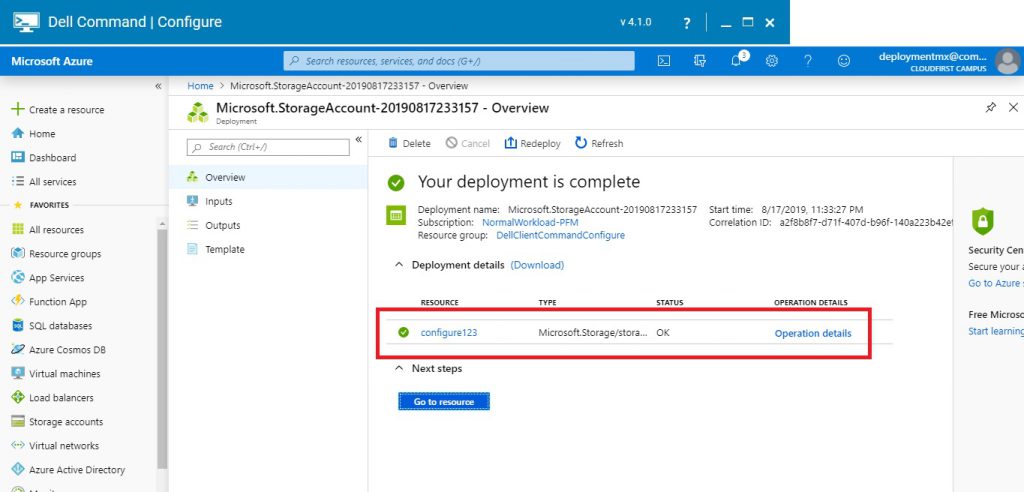
Cuando tengamos el archivo .exe, el siguiente paso es exportarlo a Azure Blob Storage, para mas informacion sobre el proceso puedes consultar aqui. Para realizar el procedimiento debemos primeramente crear un Azure Blob Storage Account.
English:
When we have the .exe file, the next step is to export it to Azure Blob Storage, for more information about the process you can check here. To perform the procedure we must first create an Azure Blob Storage Account.
Spanish:
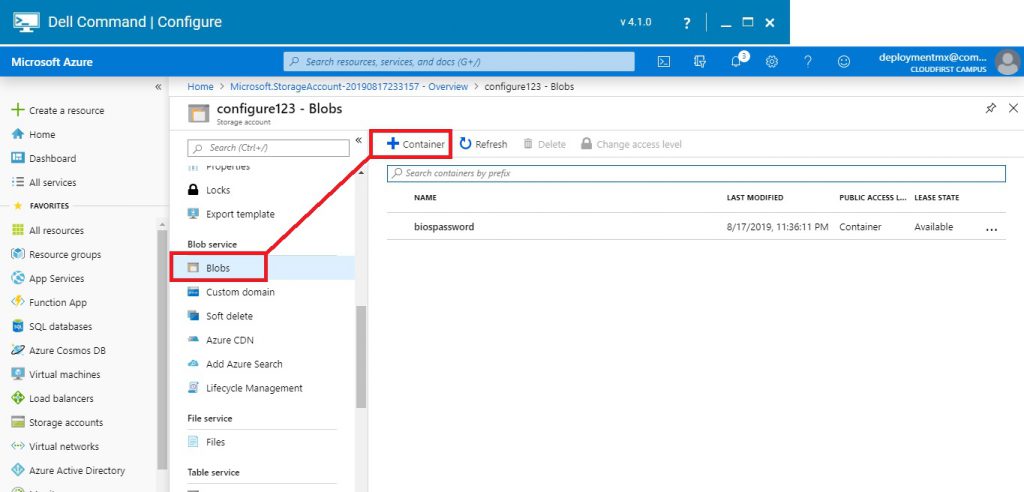
Entramos a nuestro recurso y nos dirijimos al panel izquiero en la parte de Blobs para crear un nuevo Container. Desde este punto podremos agregar tantos archivos Dell Command Configure queramos implementar.
English:
We enter our resource and go to the left panel in the Blobs part to create a new Container. From this point we can add as many Dell Command Configure files we want to implement.
Español:
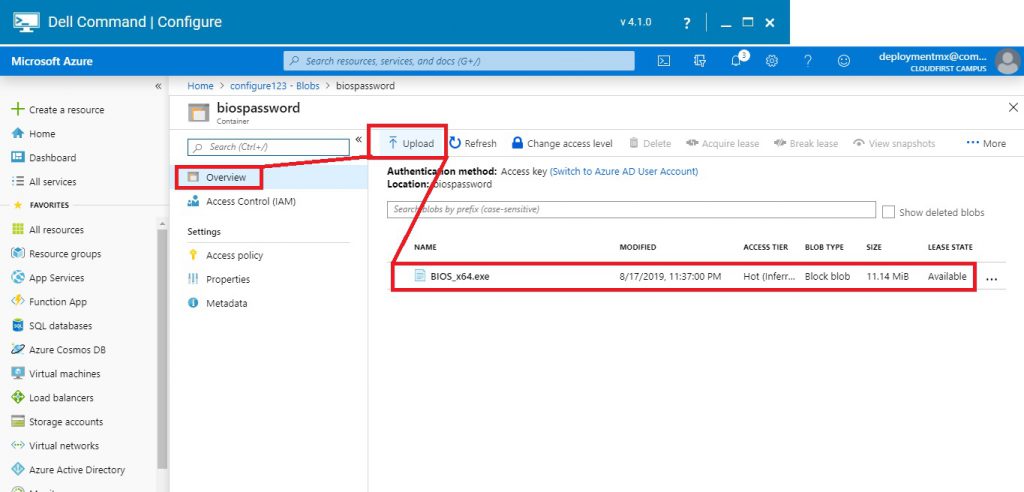
Ahora, vamos a subir nuestro archivo .EXE que contine la instruccion para poder hacer las modificaciones a BIOS (Equipos Dell). Cuanto tengamos el archivo en Azure lo veremos como se muestra a continuacion.
English:
Now, we are going to upload our .EXE file that contains the instruction to be able to make the modifications to BIOS (Dell Computers). As long as we have the file in Azure we will see it as shown below.
Español:
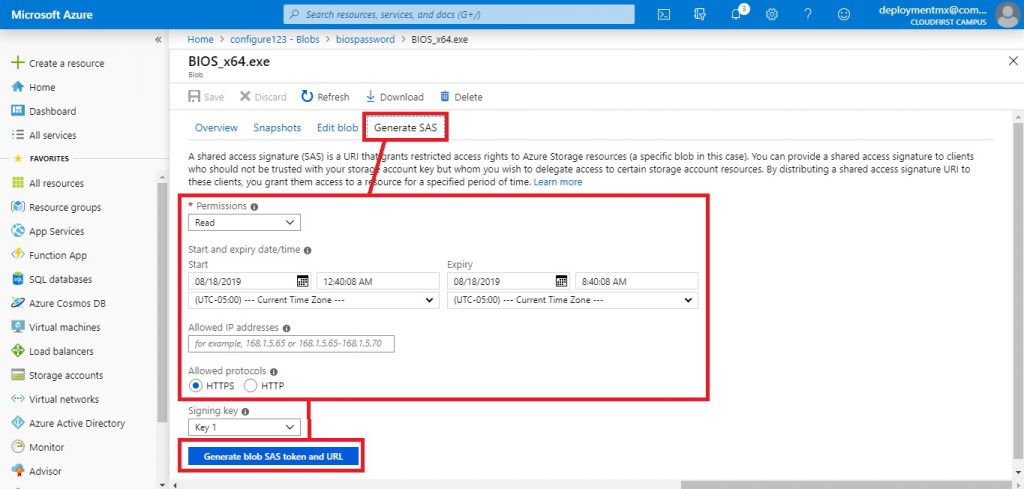
Ahora debemos generar un SAS (Shared Access Signature). Esto nos ayudara a controlar cuando el archivo va a expirar y/o si sera privado para su uso o publico a traves de la URL generada.
English:
Now we must generate a SAS (Shared Access Signature). This will help us control when the file will expire and / or if it will be private for use or published through the generated URL.
Español:
Hasta este punto tenemos nuestra URL configurada con el archivo .exe de Dell Command Configure. Ahora, el siguiente paso es crear un archivo .PS1 que contenga la informacion de la URL de mi Blob. para esto les comparto un articulo que me me ayudo a construir mi archivo base.
Debemos crear como siguiente paso un archivo de texto y colocar la siguiente informacion
English:
Up to this point we have our URL configured with the Dell Command Configure .exe file. Now, the next step is to create a .PS1 file that contains the URL information of my Blob. For this I share an article that helped me build my base file.
as next step a text file and place the following information
|
1 2 3 4 5 |
$Path = $env:TEMP $Installer = "BIOS_x64.exe" Invoke-WebRequest "https://<strong><<name>></strong>.blob.core.windows.net/biospassword/BIOS_x64.exe?sp=r&st=2019-08-18T04:55:16Z&se=2019-08-18T12:55:16Z&spr=https&sv=2018-03-28&sig=QoZ3qLqiElDoh3DiWK7nJEvbnTNBH3IO5wc2uomXZhQ%3D&sr=b" -OutFile $Path\$Installer Start-Process -FilePath $Path\$Installer -Verb RunAs -Wait Remove-Item $Path\$Installer |
Español:
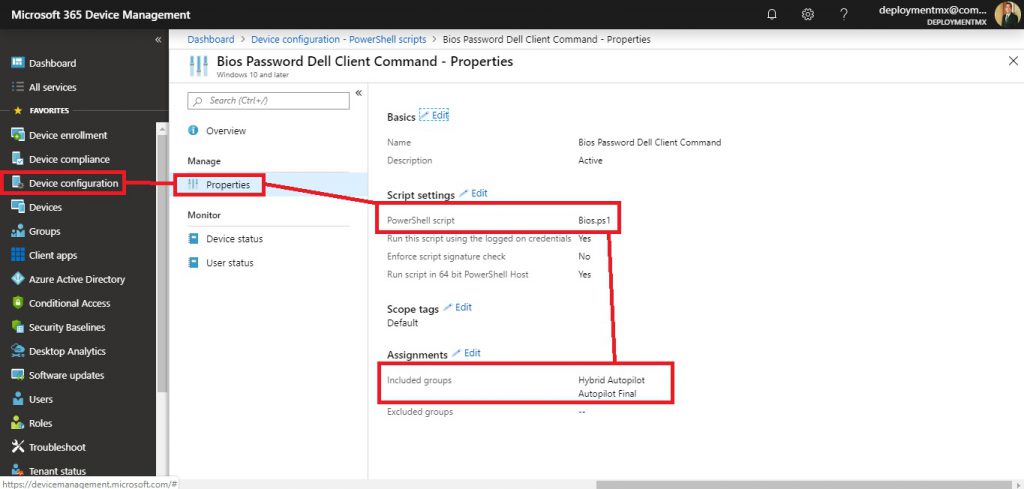
En donde estara la funcion Invoke-WebRequest apuntando a mi URL de mi Blob junto con la configuracion de Token SAS. Este arhivo lo guardamos con extension de powershell .PS1. Por ultimo hacemos uso de Microsoft Intune para poder Implementarlo, podemos entrar desde la URL https://devicemanagement.microsoft.com
Dentro de Intune nos vamos a ir al panel Izquierdo y damos clic en Device Configuration-Powershell Scripts – Add
English:
Where will the Invoke-WebRequest function be pointing to my URL of my Blob along with the configuration of Token SAS. This file is saved with powershell extension .PS1. Finally we use Microsoft Intune to implement it, we can enter from the URL https://devicemanagement.microsoft.com
Inside Intune we will go to the Left panel and click on Device Configuration-Powershell Scripts – Add
Español:
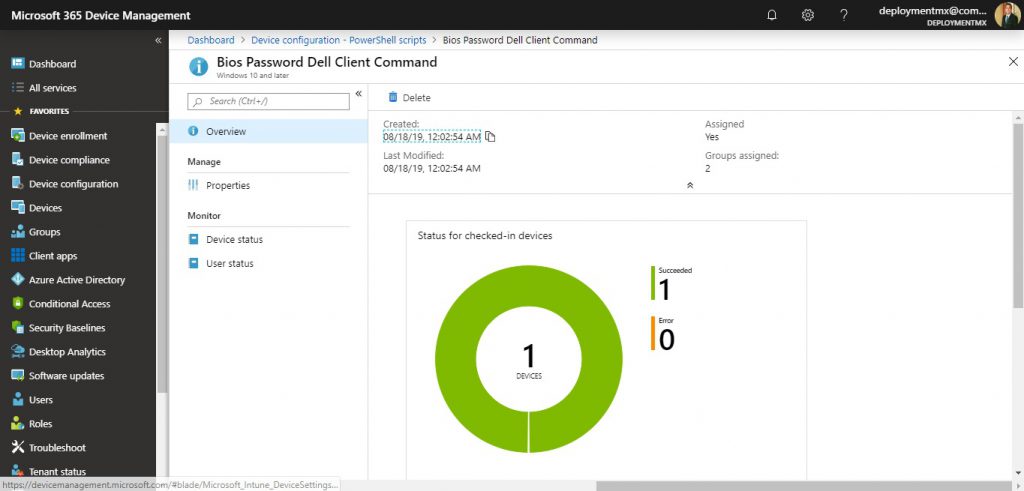
No olvidemos asignar a nuestro grupos de equipos, y listo de forma automatica el proceso comenzara a correren nuestro equipo cliente administrado por Microsoft Intune. Veamos los resultados
English:
Do not forget to assign to our groups of teams, and ready automatically the process will begin to run our client computer managed by Microsoft Intune. Let’s see the results
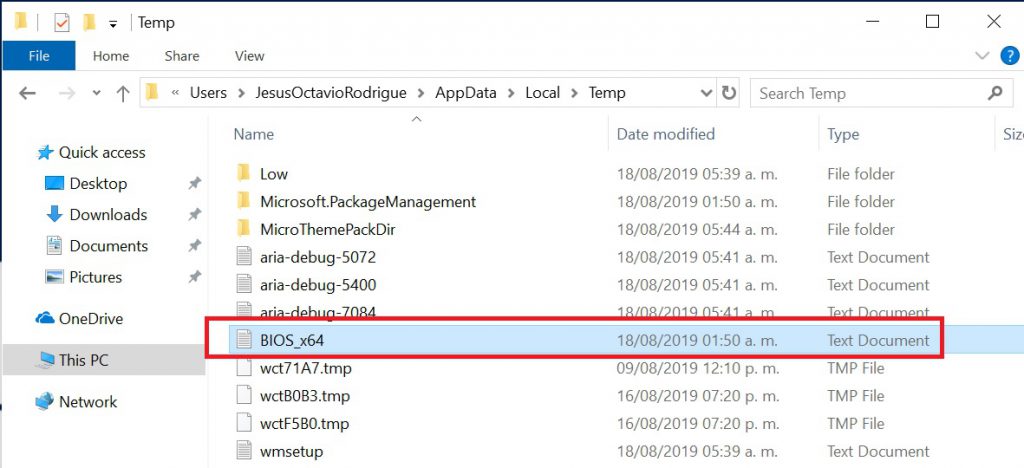
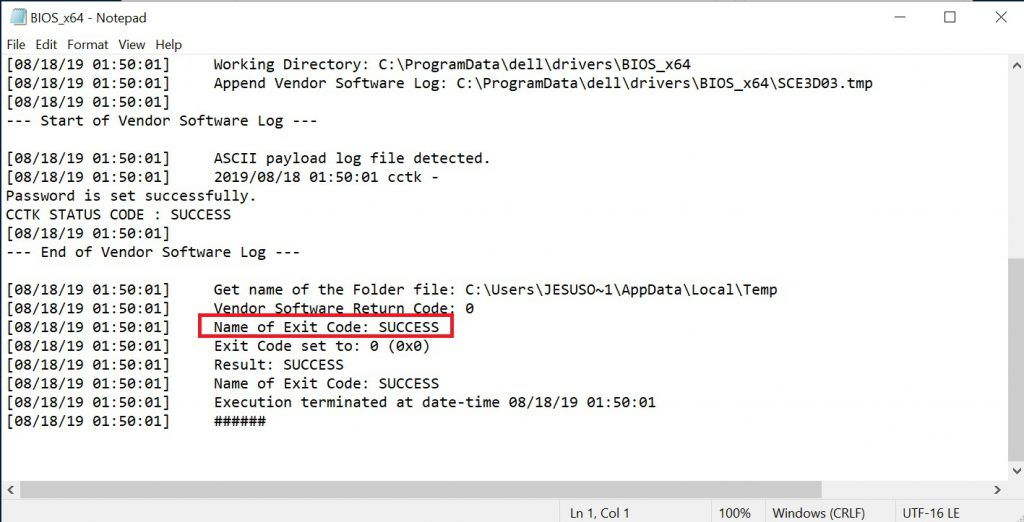
Podemos ver el log en la carpeta %Temp% de nuestro dispositivo.
We can see the log in the %Temp% folder of our device.
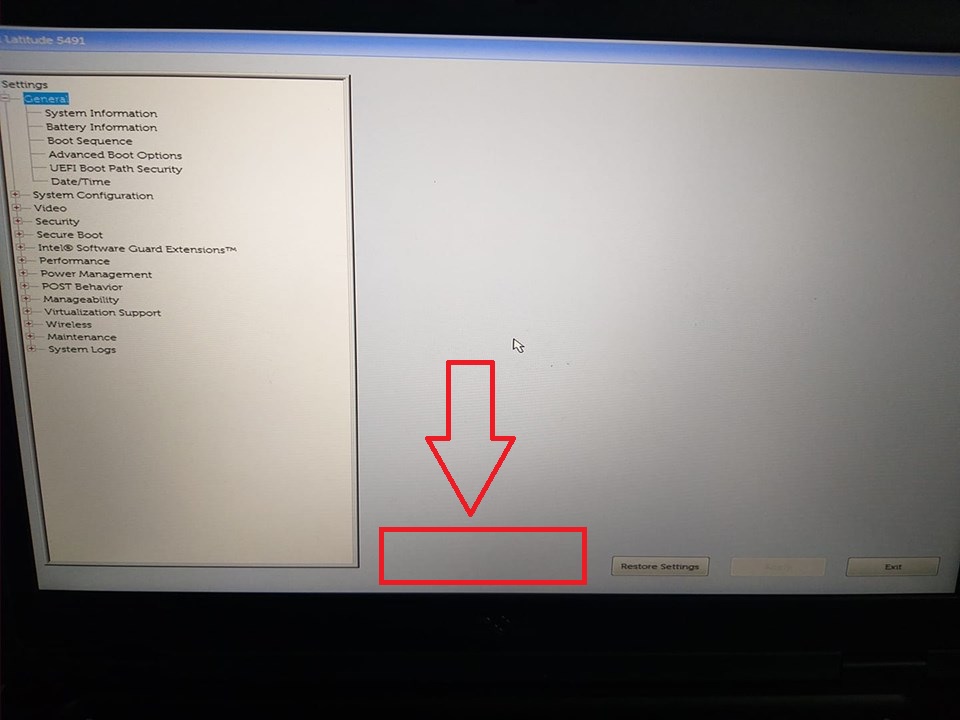
Sin Password Activo – Without Active Password
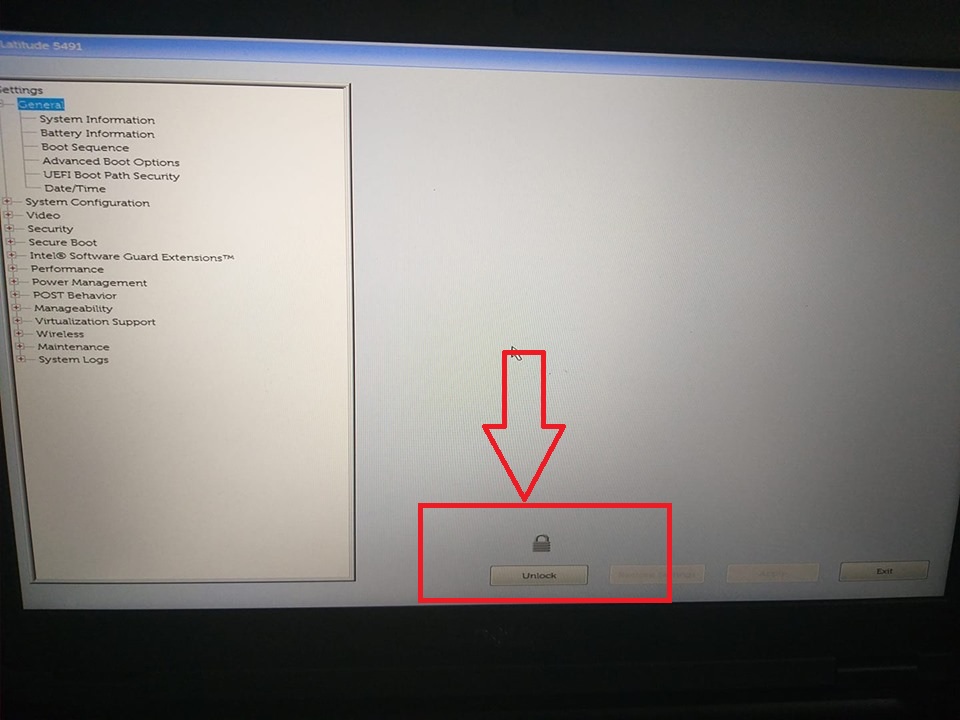
Con Password Activo – With Active Password
Español:
Sin mas por el momento me despido enviandoles un gran saludo a todos mis lectores, estamos con nuevos post.
Felices Despliegues.
English:
Without more for the moment I say goodbye by sending a big greeting to all my readers, we are with new post.
Happy deployments.
