Welcome to Delicate template
Header
Just another WordPress site
Header

EdgeSight for Load Testing is an automated load and performance testing solution for Citrix XenApp and XenDesktop environments.

When you use ESLT it’s posible, if that you install  the software with one user and execute the test with another user, don’t run and you receive an error. (más…)

Two years ago I spoke in Citrix GeekSpealk Local in Barcelona about tools and some tips for XenServer.

As you know, XenServer is based on CentOS Linux. As a good Linux, XenServer have a online repository for software and you can actívate this , for download aditional software for análisis and troubleshooting. Or other packages as a FTP Server… you know.

Important: This change is not supported by Citrix. Any aditional service installed on server can cause poor performance and system crashes.

Ops, this is dangerous! But, it can help-me to analyce the server with some tools very interesting on Linux world.

How can I activate the repositoty?

This is a easy step that you can see in continuation:

Logon to XenServer console or through ssh client, and do:

 #cd /etc/yum.d.repo

 Here, we have the repo file.

 Citrix.repo <- Software Citrix Repository for XenServer updates

CentOS-Media.repo <- CD CentOS Repository

CentOS-Base.repo.orig <- Orginal Repository CentOS OS.

CentOS-Bae.repo <- Repository CentOS for edit .

If you edit this file, you can see that CentOS URL are commented with # and disabled. You can edit this file with text editor as VI and delete this # for activate the CentOS repositori and change the value of “enabled” from 0 to 1.

I active all repositoris on CentOS-Base except updates.

Be Carefull! One update in system and is posible that you need reinstall the server complete.

Now, it’s the momento for use “yum”

Firstly you need to upgrade the repository index. Type:

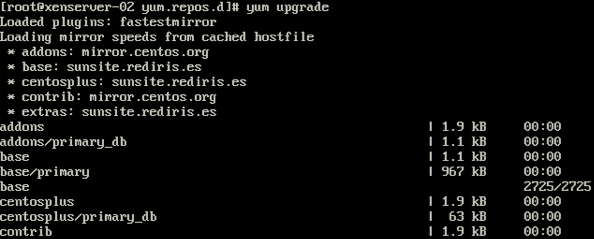
# yum upgrade

This is a upgrade without CentOS repos active:

After modify the repo file, and upgrade the server you can see this:

When finish the upgrade the repo list type NO INSTALL updates.

And now, is the momento to find now software for Troubleshoting our XenServer enviroments.

You can type:

# yum search ip <- search all packets that content the ip stream.

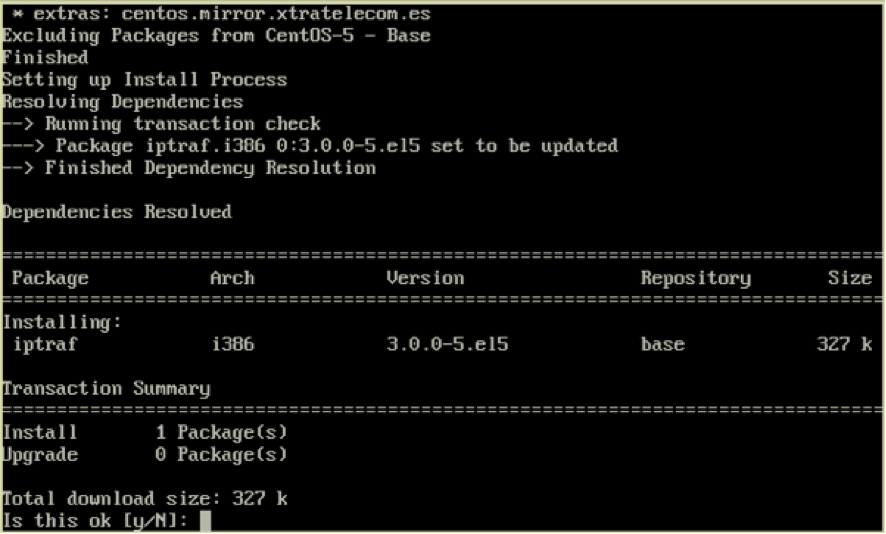
If you know the packet is moment the install this. For example, we install iptraf for monitoring de real time ip trafic on XenServer.

# yum install iptraf

Type Y and Install.

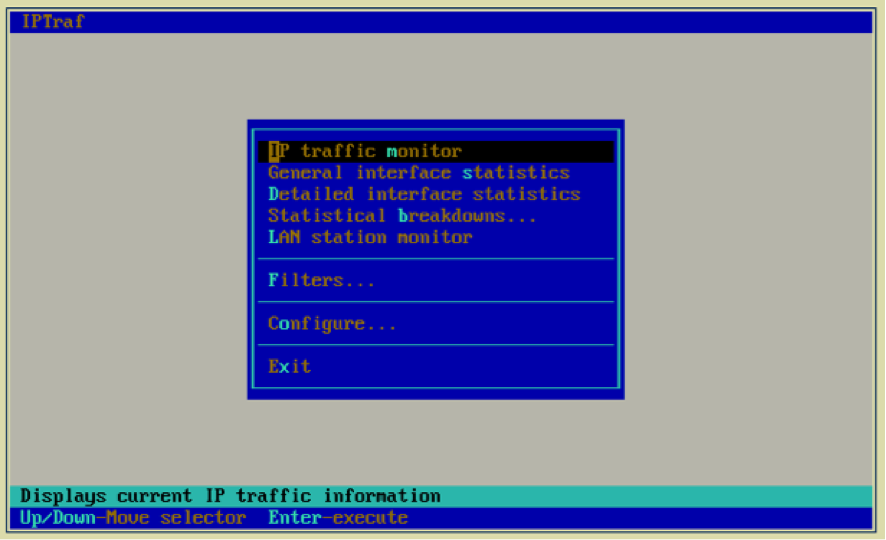
and boala! I have iptraf for XenServer.

In the next post, i talk about interesting tools for Troubleshooting and Monitoring XenServer.

Thanks for Folowme 😉

Today speak of a task very easy, in some cases, can be a headache for administrators who come from Windows.

At times, the support team may request certain system logs for review.

XenCenter has an option to generate a zip file that contain information on logs and system commands.
But, as we import logs if we do not have XenCenter? see how to import specific logs with old method.

For do this, you need a ssh/scp software o use any terminal for connect to xenserver. I talk how do it from MAC/Linux and from Windows.

MAC & *IX SO

Only need to run a terminal/Shell and use the command scp for do this. How? See this.

Note. You need to know the exact path that containt the file that you need import.

If you need recover the messages log, for example, in your desktop terminal type:

GENERAL SINTAX:

DOWNLOAD:

scp USER@IP_SERVER:/PATH/FILE  LOCAL_PATH

UPLOAD:

scp LOCAL_PATHFILE USER@IP_SERVER:/PATH/

Example:
# scp root@192.168.1.200:/var/log/messages c:UserscristiansanDesktop

Windows SO

How i do on Windows if we haven’t terminal?

All administrators know putty for SSH connections.
Another imprescidible tool for admins is winscp. Winscp, is a client sftp.

Log on XenServer with winscp gui and use a similar to FTP GUI interface for upload and download files from/to XenServer.

I don’t explain this tool because is very easy. Try it!

Resources:

Putty: http://www.putty.org/
WinSCP: http://winscp.net/
Man SSH  Man SCP

Another resource in this blog related with this: SSH key: MAC/LINUX to XenServer without PASS

A few days ago, we had an incident with one client that he lost the connection with iscsi LUN where have the VM HDD.

The StorageRepository appear with de red blade and isn’t possible «reattach» process. When you do the action, we have the next message:

The attempt to query the iSCSi daemon failed

We don’t found error reported on Support Forums. In the logs of system i can see:

XenServer Log

ERROR XenAdmin.Actions.AsyncAction [3600] – The attempt to query the iSCSi daemon failed

ERROR XenAdmin.Actions.AsyncAction [3600] – en XenAdmin.Actions.SrRepairAction.Run() en XenAdmin.Actions.AsyncAction.RunWorkerThread(Object o)

SMLOG

Raising exception [86, Failed to query the iscsi daemon [opterr=Failed to logout from target]]

FAILED: (errno 5) stdout: », stderr: ‘ Volume group «VG_XenStorage-cc734a73-5a5f-5fd1-24cf- 308258bc1fd2» not found’

We tested in XenServer that you can validate with openiscsi perfectly but isn’t posible connect to LUN. Is strange because all other LUN in the NAS is not affected.

We destroy de PBD connector and recreate again, with de the same problem.

The customer talk with NAS Manufacturer and is necessary update de Firmware. It’s posible a NAS error, but if this the problem, how i recover the VMs on this LUN.

In this post i don’t  explain how to troublesshot de iscsi connection. I explain how to recover the LUN across the Live Linux Distribution.  Any LiveCD is valid.

You only need to run Linux SO. The first step is install the necessary packets for do the recuperation. You only need the OpeniScsi packets. LVM2 is optional if you like to try mount the filesystem.

We talk with the client and ask that is necessary to create a LUN with the same size that the corrupted lun. With this, i create a VM with XenServer and run the liveCD.

When the Linux Live is running, we need to open a terminal and install the necessary packets.

# sudo apt-get install open-iscsi

When the install is finished is time to connect with Lun and recover the information.  For do this…

Start iscsi daemon

# /etc/init.d/open-iscsi start

Discover targets

#iscsiadm -m discovery -t sendtargets -p [IP_Target]

IP_TARGET:3260,1 iqn.2002-10.com.target:RESOURCE1

IP_TARGET:3260,1 iqn.2002-10.com.target:RESOURCE2

IP_TARGET:3260,1 iqn.2002-10.com.target:RESOURCE3

establish the credentials

# iscsiadmin -m node -t IP_TARGET:3260,1 iqn.2002-10.com.target:RESOURCE1 -P [IP_Target] -o update -n node.session.auth.username -v [USER]

# iscsiadmin -m node -t IP_TARGET:3260,1 iqn.2002-10.com.target:RESOURCE1 -P [IP_Target] -o update -n node.session.auth.password-v [PASSWD]

and now connect to target

# iscsiadm -m node -t IP_TARGET:3260,1 iqn.2002-10.com.target:RESOURCE1 -p [IP_Target] -l

with fdisk -l, you can see the device used. In my case we use /dev/sdb.

Realice the same process for the New LUN created. Is mapped with the next device available. In my case: /dev/sdc

In this point is the moment for recover the info. And how i do?

It’s easy, we do a copy block to block from sdb device to sdc device.  For do this, we type the next command:

# dd if=/dev/sdb of=/dev/sdc bs=512 conv=noerror,sync

The process is slow and take his time. You can see if the command is running with TOP command or PS command. When the command is finished is time to create again the SR on XenCenter. The new SR with the old SR copy is ready to use.

For more info about this, i recommended read the man pages:

 http://linux.die.net/man/8/iscsiadm

http://linux.die.net/man/1/dd

————–

¿Do you need help with your Citrix Enviroments?

Visit us at www.ctxdom.com or contract us at www.101-consulting.com